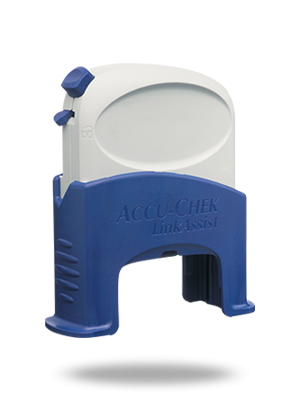
The Accu-Chek LinkAssist insertion device is specifically designed for use with the Accu-Chek FlexLink infusion set, and helps ensure a more successful, virtually pain-free insertion1
Reference:
1. Liebl A, Klinge A, Buhr. Clinical benefits of automatic insertion of infusion sets in CSII. Presented at: 26th Workshop of the Study Group on Artificial Insulin Delivery, Pancreas and Islet Transplantation (AIDPIT) of the European Association for the Study of Diabetes (EASD) and 1st European Diabetes Technology and Transplantation Meeting; Feb. 4-6, 2007; Montpellier, France.
- Quick, intuitive automatic insertion process
- Assists with placement in hard-to-reach areas with one hand
- Integrated safety release helps avoid unintended insertions
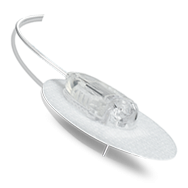
90° angle
Accu-Chek FlexLink
Please refer to the instructions for use of the Accu-Chek Flexlink infusion set and Accu-Chek LinkAssist insertion device for warnings, precautions and more detailed information.
Download the Accu-Chek LinkAssist training chart
Please wash your hands before use. Choose a site away from waistline, bones, scar tissue, belly button and recent insertion sites. Prepare site according to the instructions from your health care professional. Allow the insertion site to dry before the cannula is inserted.
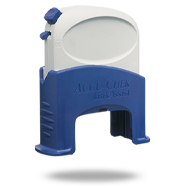
- Push the tensioning element (grey) of the insertion device into its base (blue).
- The insertion device is now pre-tensioned. This step “locks” the safety catch in place, and automatically makes the insertion device secure.
- Hold the infusion set by its protective cover between the thumb and the forefinger and with the blue holder cap pointing upward, insert it from below into the opening of the insertion device until you feel it lock into place.
- Carefully remove the transparent protective cover of the infusion set by turning and pulling at the same time.
- Remove both pieces of the self-adhesive backing from the infusion set.
- Hold the base of the insertion device firmly in one hand and with the other hand pull the tensioning element (grey) out and up as far as it will go.
- Holding the tensioning element, position the insertion device onto the prepared infusion site. Activate the insertion device by sliding the safety catch out of the “lock” position. Press the release button to introduce the cannula into the skin. The Accu-Chek LinkAssist insertion device can now be removed from the infusion site and set aside.
- Smooth out the self-adhesive and run your fingers over it. This ensures good skin contact and secure positioning of the infusion set.
- Hold the self-adhesive in place. Carefully and gently press the side clips of the blue holder cap together and pull it from the cannula housing.
- To remove the introducer needle, hold the cannula housing firmly to your body. Withdraw the introducer needle by its blue handle in a straight angle. Discard your introducer needle and infusion set after use according to local regulations.
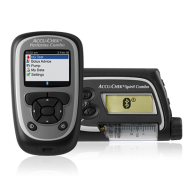
- Connect the primed* tubing to the newly inserted cannula. A click must be heard when connecting. Fill the empty space of the cannula with a bolus of 1.0 units of insulin U-100. Start the insulin pump.
*How to prime the tubing set: Screw the luer-lock tightly into the insulin pump adapter. Prime the Accu-Chek FlexLink infusion set according to the insulin pump manufacturer’s operating instructions until the insulin emerges at the tip of the connector needle. Do not leave air bubbles in either the cartridge or the tubing.
For more information on how to use the infusion set and insulin pump, please refer to your Accu-Chek LinkAssist insertion device and the Accu-Chek FlexLink infusion set training chart.
90°
90 x 79 x 28 mm (when ready for insertion)
Accu-Chek FlexLink with blue holder cap