Sorry, you need to enable JavaScript to visit this website.
hamburger overlay

Frequently Asked Questions

Special features

You can set up to 4 test reminders per day. At the set reminder time, the meter will beep every 2 minutes, up to 3 times per reminder. The meter will not beep if the meter is on at the reminder time, or if a test has been run within 30 minutes of the reminder time.

Yes. Simply go into setup mode and turn the beeper off.

The meter is compatible with all Accu-Chek data management tools, including the Accu-Chek 360o diabetes management system.

With the new Accu-Chek Performa blood glucose meters, it is not necessary to delete stored results. Once 500 blood sugar (glucose) results are in the memory, adding a new result causes the oldest one to be deleted.

No, the meter will no longer provide an automatic warning message telling you that your vial of test strips will soon expire or lock you out once they have expired.

Test Strips and control tests

Performing a control test lets the user know the meter and test strips are working properly. Perform a control test when:

  • You open a new test strip box
  • You left the test strip container open
  • You think the test strips are damaged
  • You want to check the meter and test strips
  • The test strips were stored in extreme temperatures, humidity, or both
  • You dropped the meter
  • Your test result does not match how you feel
  • You want to check if you are performing the test correctly

The Accu-Chek Performa blood glucose meter automatically recognises Accu-Chek Performa Control Solutions, so running a control test is easier than ever. First, wipe the tip of the control bottle. Then put the meter on a flat surface, insert the strip, and squeeze a drop of the control solution onto the front edge of the test strip. A result appears with a flashing “L”. Press one of the arrow keys once to indicate a Level 1 control test or twice to indicate Level 2. Press the ON/OFF button to set the level in the meter. The control result and “OK” alternate in the display if the result is in range.

Control test values will not be in the user-accessible memory. However, they will be stored in the downloadable memory.

In the same way that fresh blood should always be used for monitoring, fresh control solution should be used to prevent a contaminated control drop. Control solution should always be wiped from the tip of the bottle so that only what is in the bottle itself is used for the test.

Meter care and batteries

Watch this short video to see how easy it is to set the date and time.

https://youtu.be/OhnTM2iD5q8

Your meter comes with the batteries already installed and a preset time and date. You may need to change the time to match your time zone or, if you live in a state that observes daylight saving time, to reflect the time change.

To change these settings:

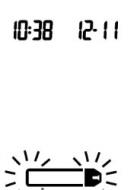
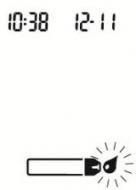
  1. Press and release the On/Off button to turn the meter on. The flashing test strip symbol appears. NOTE: If this is the first time your meter has been turned on, it will automatically enter the set-up mode, and "Set-up" and the hour will flash on the display. Skip to Step 3 to change the time or, if the date and time are correct, press and hold the On/Off button to exit the set-up mode.
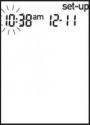
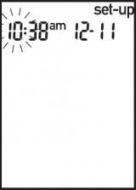
  2. To enter the set-up mode, press and hold the On/Off button for about four seconds. “Set-up” and the hour flash on the display.
  3. Press and release the arrows to decrease or increase the hour. Press and hold the arrows to scroll faster.
  4. Press and release the On/Off button to set the hour. The minutes flash.
  5. Repeat steps 3 and 4 to set the minutes, AM/PM, month, day and year. The flashing field is the one you are changing.

Once you set the correct time and date, press and hold the On/Off button until the flashing test strip symbol appears.

Your battery should last for approximately 2,000 tests.

Make sure you have a new 3-volt, lithium battery, number CR2032, to insert. Open the battery door on the back of the meter, remove the old battery for at least 20 seconds, and press any button on the meter. Insert the new battery with the “+” sign facing out. Snap the battery door back into place. Press the on/off button, and the meter will beep. Setup and hour are flashing on the display. If the date and time are correct, press and hold the on/off button for about 4 seconds. Release the button, and you’re done.

VIEW ALL FAQs
Still can't find what you need?

We want your feedback!

GO